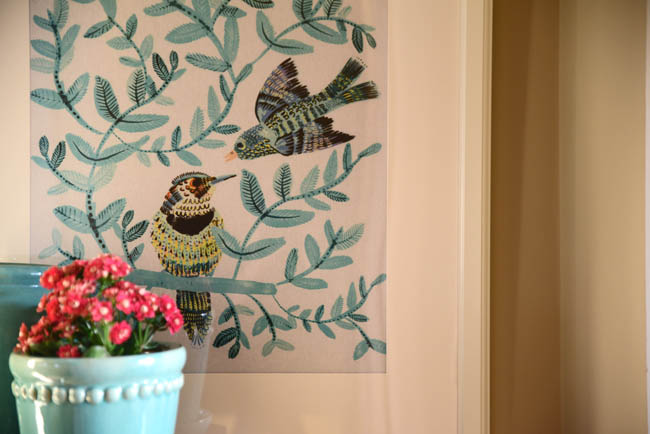
Anthropologie has the most charming dish towels – to the point that whenever I see them I think “these absolutely have no business in a kitchen that uses such towels to dry Star Wars and Hello Kitty plastic cups” – and I leave without purchasing any, wondering what else could be done with them. I’ve seen several cute blogs with posts about using the darling dishtowels to make pillow covers (for example, link here), but that would mean using a sewing machine (I may be going for some sort of record for owning a sewing machine but never taking it out of the box) and just generally taking more time than I am willing to spend on most DIY projects. I decided to frame the towel, using a large scale but inexpensive Ikea frame. The few and simple materials and steps are included below.
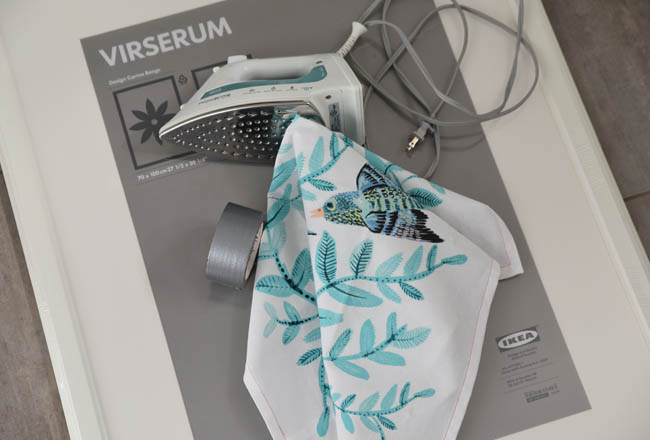 Materials: Iron for pressing, scissors, strong hold tape (I recommend duct tape), and a large scale frame with a mat (although you really can use any size, so long as you are willing to cut the towel). I used this 27 1/2 x 39 1/4 Ikea one because I wanted to see the entire pattern on the towel and the space I have in mind for it is quite large. For the towel, choose one with an all over pattern that doesn’t have anything square with the edges of the towel (that way you don’t need to worry about everything remaining square with the mat while pulling the towel to the edges). I really loved this aqua color of this one but I’m thinking that I would love this fruit one for the kitchen at the cabin and this ice cream cone version in Ella’s room. Lots of options!
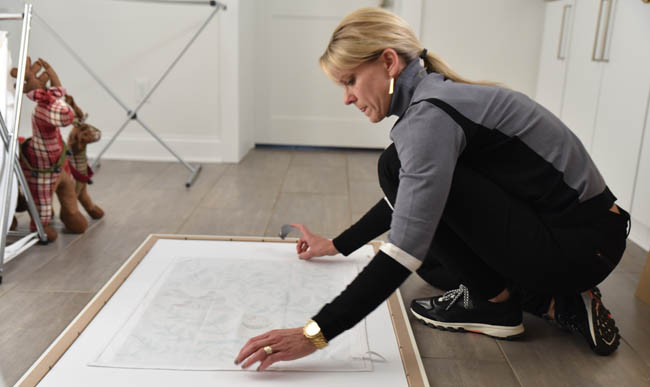 Put the frame face down on a flat, level surface. Place the towel in the approximate position where you would like it, although know that there will be a bit of shifting (again, why using an allover pattern is important). I think this picture is hilarious – between the sweater riding up in the back, my tongue sticking out in concentration and the extremely random reindeer staring me down – this is one of those times when I look back on the pictures and know that Trevor had close to zero interest in taking these shots.
 Start at one side of the frame and place a strip of duct tape, securing the towel to the mat.
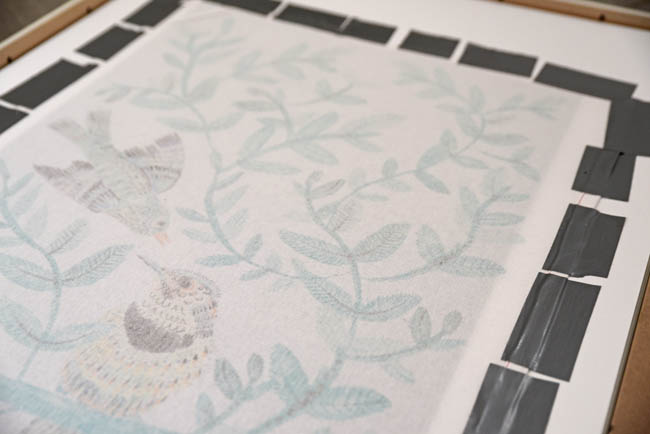
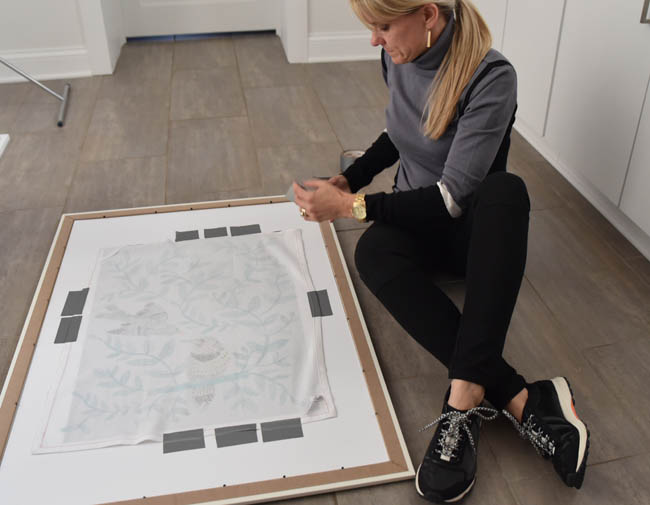 Once a strip of tape is placed, go directly across, stretch the fabric (very tightly!) and place another strip of tape. After the first few it will look like the fabric is starting to buckle (you can see it in the picture above), but it all works itself out in the end. But the key is to work consistently from one side to directly across and to pull tightly until the entire towel is secured (see below). This part of the process may seem tedious, but it doesn’t take long. Only about 14 mintues, actually (I know this because I did it while I cooked tater tots in the oven for the kids). Replace the back of the frame and the project is complete!
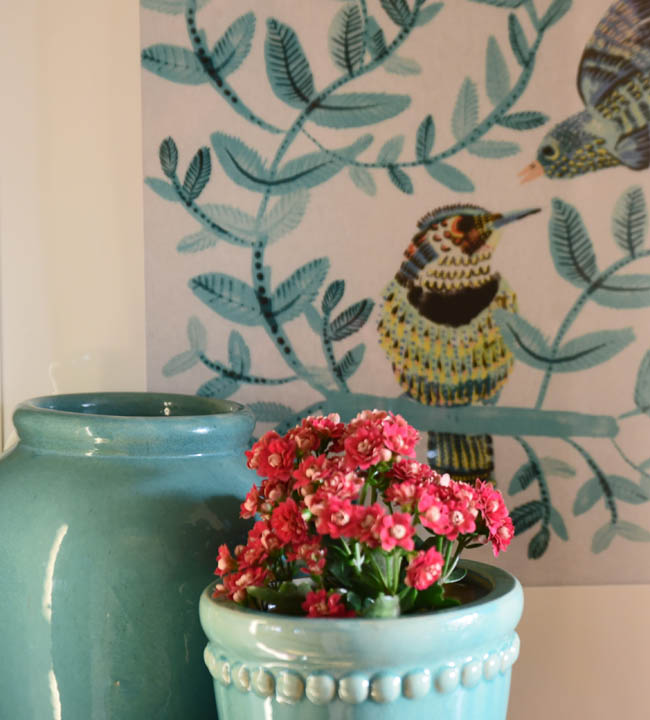 Reality Check. Be sure to check how the towel appears from the front before securing all of the fasteners on the back of the frame (the Ikea frames are great because they secure tightly on the back, but the number of little fasteners can drive me crazy). I note this because I ALWAYS skip this step in an effort to save time and ALWAYS end up having to reposition whatever I am framing. With this project I actually did it twice – a portion of the stitching from the top of the towel showing at the top of the frame each time. I ran out of time to fix it the second time – thank goodness for cropping!

 Materials: Iron for pressing, scissors, strong hold tape (I recommend duct tape), and a large scale frame with a mat (although you really can use any size, so long as you are willing to cut the towel). I used this 27 1/2 x 39 1/4 Ikea one because I wanted to see the entire pattern on the towel and the space I have in mind for it is quite large. For the towel, choose one with an all over pattern that doesn’t have anything square with the edges of the towel (that way you don’t need to worry about everything remaining square with the mat while pulling the towel to the edges). I really loved this aqua color of this one but I’m thinking that I would love this fruit one for the kitchen at the cabin and this ice cream cone version in Ella’s room. Lots of options!
 Put the frame face down on a flat, level surface. Place the towel in the approximate position where you would like it, although know that there will be a bit of shifting (again, why using an allover pattern is important). I think this picture is hilarious – between the sweater riding up in the back, my tongue sticking out in concentration and the extremely random reindeer staring me down – this is one of those times when I look back on the pictures and know that Trevor had close to zero interest in taking these shots.
 Start at one side of the frame and place a strip of duct tape, securing the towel to the mat.
 Once a strip of tape is placed, go directly across, stretch the fabric (very tightly!) and place another strip of tape. After the first few it will look like the fabric is starting to buckle (you can see it in the picture above), but it all works itself out in the end. But the key is to work consistently from one side to directly across and to pull tightly until the entire towel is secured (see below). This part of the process may seem tedious, but it doesn’t take long. Only about 14 mintues, actually (I know this because I did it while I cooked tater tots in the oven for the kids). Replace the back of the frame and the project is complete!
 Reality Check. Be sure to check how the towel appears from the front before securing all of the fasteners on the back of the frame (the Ikea frames are great because they secure tightly on the back, but the number of little fasteners can drive me crazy). I note this because I ALWAYS skip this step in an effort to save time and ALWAYS end up having to reposition whatever I am framing. With this project I actually did it twice – a portion of the stitching from the top of the towel showing at the top of the frame each time. I ran out of time to fix it the second time – thank goodness for cropping!

debra
November 2, 2015 at 1:27 am (9 years ago)I love it! and that is one gorgeous dish towel!
Kerry
November 3, 2015 at 7:40 am (9 years ago)Thanks Debra!